首先搭建一个Eureka注册中心
创建一个maven工程,引入pom依赖
   <parent>
        <groupId>org.springframework.boot</groupId>
        <artifactId>spring-boot-starter-parent</artifactId>
        <version>2.0.1.RELEASE</version>
    </parent>
    <!-- 管理依赖 -->
    <dependencyManagement>
        <dependencies>
            <dependency>
                <groupId>org.springframework.cloud</groupId>
                <artifactId>spring-cloud-dependencies</artifactId>
                <version>Finchley.M7</version>
                <type>pom</type>
                <scope>import</scope>
            </dependency>
        </dependencies>
    </dependencyManagement>
    <dependencies>
        <!--SpringCloud eureka-server -->
        <dependency>
            <groupId>org.springframework.cloud</groupId>
            <artifactId>spring-cloud-starter-netflix-eureka-server</artifactId>
        </dependency>
    </dependencies>
    <!-- 注意: 这里必须要添加, 否者各种依赖有问题 -->
    <repositories>
        <repository>
            <id>spring-milestones</id>
            <name>Spring Milestones</name>
            <url>https://repo.spring.io/libs-milestone</url>
            <snapshots>
                <enabled>false</enabled>
            </snapshots>
        </repository>
    </repositories>
配置application.yml文件
###服务启动端口号
server:
  port: 8100

##定义服务名称
spring:
  application:
    name: com.songzixian

###服务注册名称
eureka:
  instance:
    hostname: 127.0.0.1

  ###客户端调用地址
  client:
    serviceUrl:
      defaultZone: http://${eureka.instance.hostname}:8888/eureka/


    ###因为该应用为注册中心,需要将服务注册到注册中心(集群的时候需要为true)
    register-with-eureka: true

    ###因为改应用为注册中心,不需要检索服务信息
    fetch-registry: true
启动Eureka服务
@EnableEurekaServer
@SpringBootApplication
public class AppEureka1 {

    public static void main(String[] args) {
        SpringApplication.run(AppEureka1.class,args);
    }
}
创建spring confgi2.0工程
引入pom依赖
<parent>
        <groupId>org.springframework.boot</groupId>
        <artifactId>spring-boot-starter-parent</artifactId>
        <version>2.0.1.RELEASE</version>
    </parent>
    <!-- 管理依赖 -->
    <dependencyManagement>
        <dependencies>
            <dependency>
                <groupId>org.springframework.cloud</groupId>
                <artifactId>spring-cloud-dependencies</artifactId>
                <version>Finchley.M7</version>
                <type>pom</type>
                <scope>import</scope>
            </dependency>
        </dependencies>
    </dependencyManagement>
    <dependencies>
        <!--spring-cloud 整合 config-server -->
        <dependency>
            <groupId>org.springframework.cloud</groupId>
            <artifactId>spring-cloud-config-server</artifactId>
        </dependency>
        <!-- SpringBoot整合eureka客户端 -->
        <dependency>
            <groupId>org.springframework.cloud</groupId>
            <artifactId>spring-cloud-starter-netflix-eureka-client</artifactId>
        </dependency>

    </dependencies>
    <!-- 注意: 这里必须要添加, 否者各种依赖有问题 -->
    <repositories>
        <repository>
            <id>spring-milestones</id>
            <name>Spring Milestones</name>
            <url>https://repo.spring.io/libs-milestone</url>
            <snapshots>
                <enabled>false</enabled>
            </snapshots>
        </repository>
    </repositories>
创建application.yml配置文件
###服务注册到eureka地址
eureka:
  client:
    service-url:
      defaultZone: http://localhost:8100/eureka
spring:
  application:
    ####注册中心应用名称
    name: config-server
  cloud:
    config:
      server:
        git:
          ###git环境地址
          uri: https://gitee.com/songzixian/config.git
          ####搜索目录
          search-paths:
            - config
      ####读取分支环境
      label: master
####端口号
server:
  port: 8888
启动服务
@EnableEurekaClient
@SpringBootApplication
@EnableConfigServer
public class AppConfig {

    public static void main(String[] args) {
        SpringApplication.run(AppConfig.class,args);
    }
}
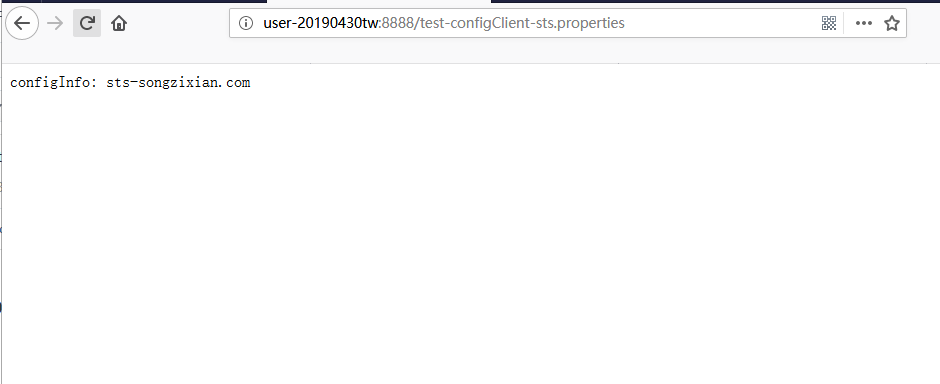
测试环境
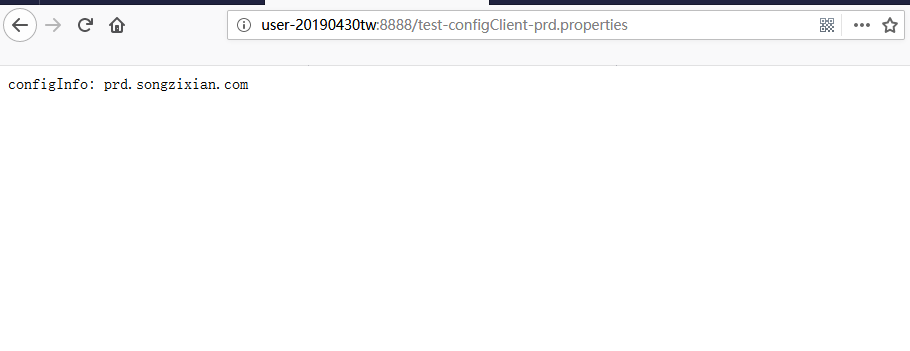
生成环境
码云配置文件参考本博客这篇教程https://songzixian.com/javaconfiguration/483.html
